


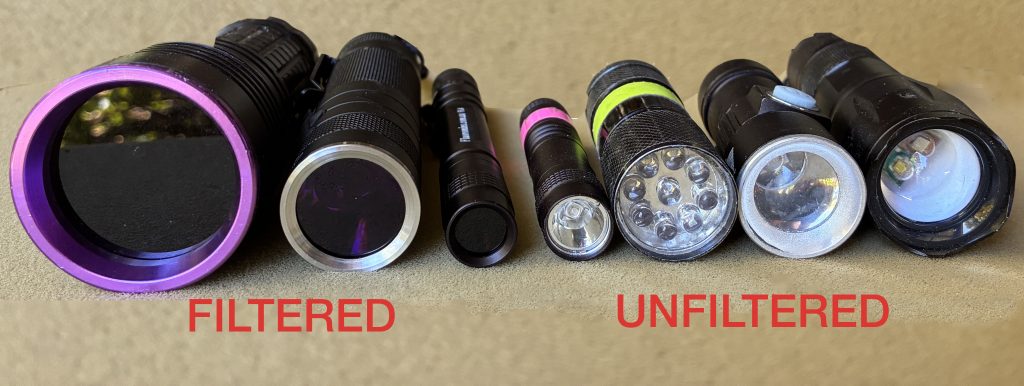
All our torches have a filter. Why?
All UV LEDs produce visible light as well as UV light. Some LEDs make not much visible light, most make more. You’ve probably seen things under a coloured light (like green or red) – it changes the colour of everything. So a UV LED does two things. (1) Its UV causes some things to fluoresce, (2) Its visible light changes the colour of things
We want to see the fluorescence. We don’t want to see the colour-changed rock. So we need to block the visible light from coming out of the torch. That’s what the filter does and that’s why it’s needed. Such filters are called “band pass filters”.
The filter looks like a black circle at the front of the torch. If there is no black circle and you can see the LED(s) then the torch has no filter and both UV and visible light will come out.
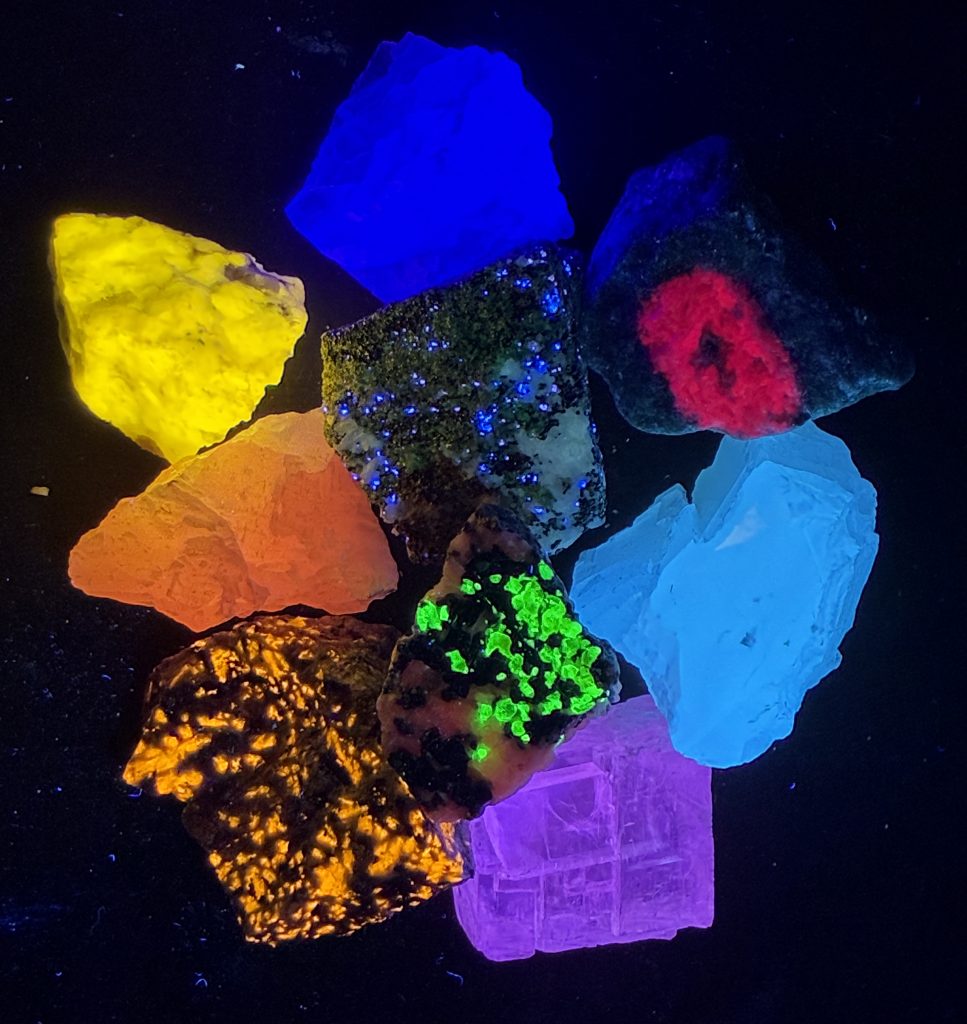
The filtered picture is beautiful. You can see why collecting and displaying fluorescent minerals can be an addictive hobby!
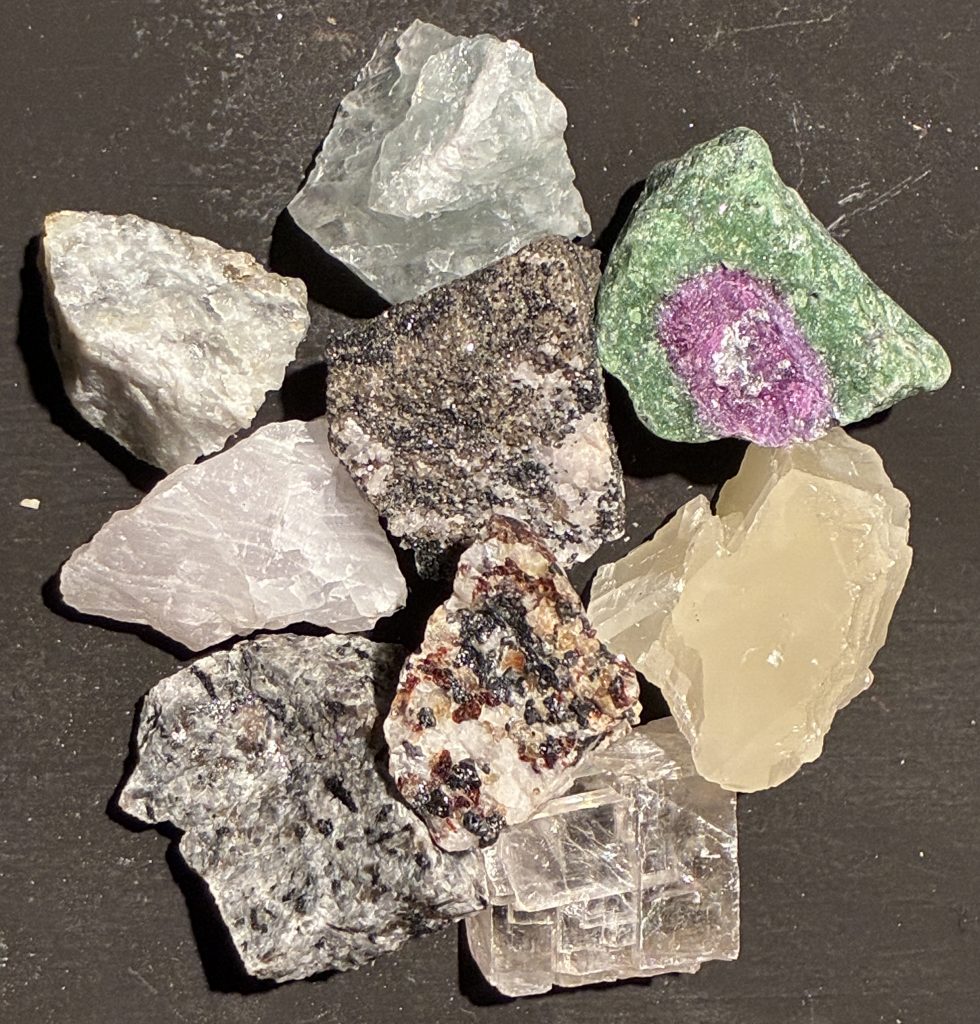
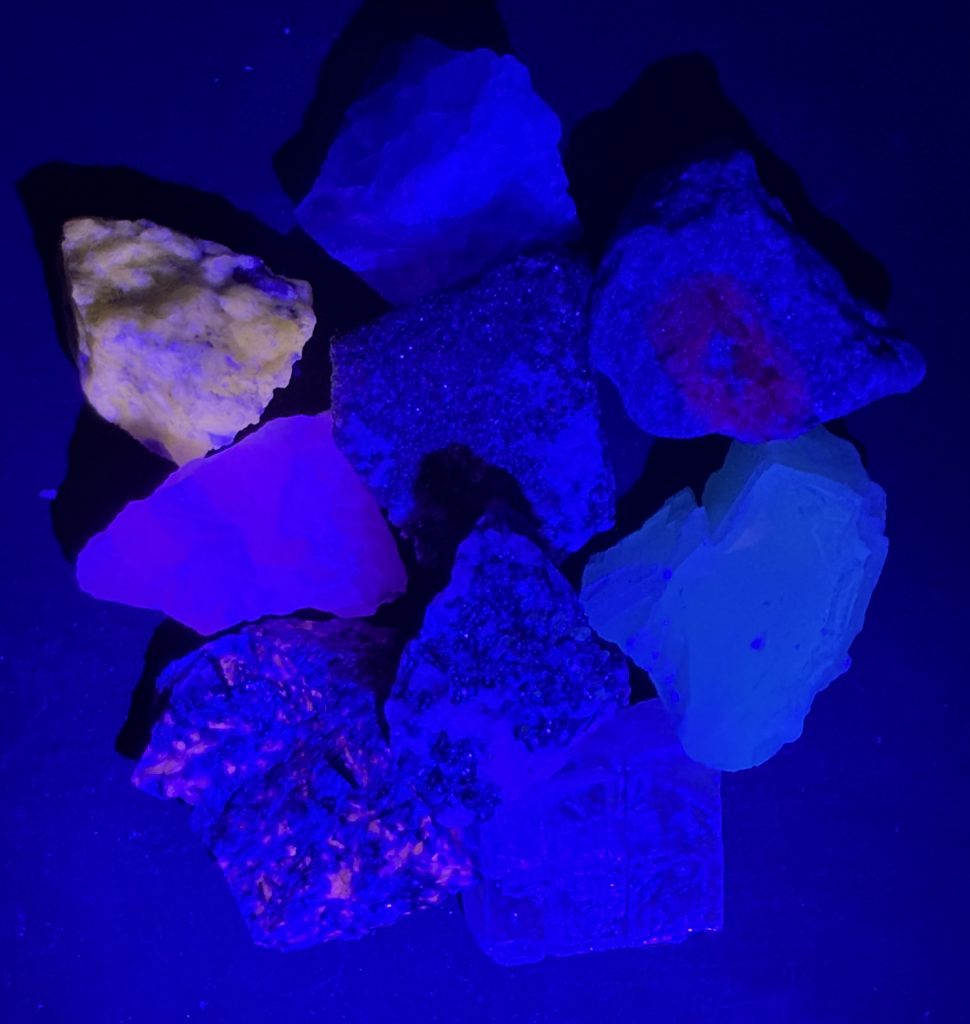
There are 9 little Long Wave rocks in the pictures. You can see the unfiltered torch is putting out a lot of blue which is almost completely overpowering the fluorescence. The black background is non-fluorescent, but the visible light coming out of the unfiltered torch is lighting it.
Note: The filtered torch I used for the filtered photo was a wide beam torch. The unfiltered one was a narrow beam torch, hence the shadows in the unfiltered photo.
[The 9 Long Wave minerals are calcite, calcite rhomb, fluorite, manganocalcite, meionite (formerly wernerite), corundum (ruby), sphalerite, sodalite, willemite on calcite. Can you ID them? Click here for the answer.]
SO… Never buy an unfiltered torch!
ABOUT FILTERS
There are numerous types of UV filters. The main ones are Hoya U325C, the ZWB series, Dichroic filters. We (and most other sellers) use the ZWB series. Hoya and Dichroic filters are very expensive and would put our torches out of the reach of many people.
Both ZWB and Hoya filters have a limited life and eventually need replacing. The deterioration process is called “solarisation” and is more of a problem for SW and MW filters. There are claims that it may not affect LW use. The effect of solarisation is that eventually little or no UV can get through and fluorescence becomes weak, even for minerals that fluoresce brightly.
More About Solarisation.
Solarisation is a type of gradual degradation caused by UV radiation, leading to a decrease in UV transmittance over time. The filter’s performance deteriorates as it absorbs UV light rather than letting it through. Factors like the filter’s material, construction, and the intensity of the UV source contribute to the rate of solarisation.
The materials used to make the filter gradually absorb more and more of the UV, and so cause a gradual change in their optical properties. The intensity of the UV source is a key factor; filters exposed to high-intensity UV light will solarise more quickly.
So over time, as the filter absorbs more and more of the UV, less and less UV is left to come out and cause the fluorescence we want.
Solarisation will eventually occur (years with normal use).
Accidents happen – your filter may get broken during use (bumped, dropped etc).
SO IN MOST KITS WE GIVE YOU A SPARE FILTER
Caring for your spare filter
UV Band Pass Filters are not made from ordinary glass. They are chemically different, and need special care. Your spare filter needs to be kept in a cool, dark, dry place away from direct sunlight until you need to use it. Likewise, you should not allow your torch to be in direct sunlight for extended periods. Doing so will hasten solarisation.
Keep your filter clean. Use the provided cloth or other soft cloth often. Filters, especially the SW/MW ones can develop a sort of scunge if you don’t keep them clean, and that can reduce the amount of UV coming out. This is more of a problem in humid places such as along the coast. If you get the scunge and ordinary cleaning doesn’t help, dilute phosphoric acid will do the trick.
How to change the filter
The “ring” that holds the filter in place can be unscrewed. Remove it, install the new filter, and screw the assembly back on. Be careful to get the threads aligned properly. If the assembly doesn’t want to screw on, don’t try to force it. Keep trying until the threads align properly and screwing is easy and smooth. Tighten, but not too tight.
GO BACK or